Crispy onion rings are simple, comforting, and loved across all ages. When done right, they are light, golden, and crunchy. When done wrong, they turn oily and soft. Most problems come from the batter, oil, heat, or prep steps people skip.
If you want to know how to prepare onion rings, the short answer is this. Use the right onions. Make a thick, cold batter. Fry at steady heat. Drain well. This guide explains each step clearly, so your onion rings turn crisp every time.
How to Make Onion Rings (Step-by-Step Overview)

Before diving into the details, it helps to see the full process. Making onion rings follows a clear flow, and Crown Foodservice recommends following each step carefully to achieve consistent, golden, and crispy results every time.
- Slice onions evenly
- Separate rings
- Prepare dry coating
- Mix the batter
- Heat the oil correctly
- Dip, coat, and fry
- Drain and season
This structure prevents soggy onion rings and uneven color. Once you understand the flow, results become consistent. This is the foundation of how to prepare onion rings the right way.
Ingredients
Good onion rings start with simple, fresh ingredients. Avoid shortcuts.
Onions
Use large yellow or white onions. They fry well and hold their shape. Sweet onions work too, but brown faster. Slice them about half an inch thick. Thin rings cook too fast and break.
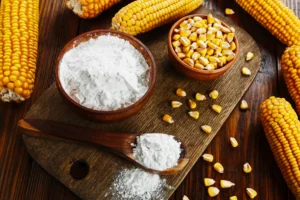
Dry Ingredients
- All-purpose flour
- Cornstarch (adds crunch)
- Salt
- Black pepper
These form the base of the best batter for onion rings.
Wet Ingredients
- Cold water or milk
- Optional sparkling water for extra crispness
Cold liquid helps batter cling and fry clean.
Oil
Use a neutral oil with a high smoke point. Palm oil or sunflower oil works well. Crown Foodservice kitchens often rely on stable frying oils to maintain even results across batches.
How to Make Batter for Onion Rings
Batter decides everything. Too thin leads to soggy onion rings. Too thick turns heavy.
Step 1: Mix Dry Base
In a bowl, mix flour, cornstarch, salt, and pepper. Whisk well to remove lumps. Cornstarch adds crunch, and flour gives structure, helping the batter coat onions evenly for crisp, golden onion rings.
Step 2: Add Cold Liquid
Slowly pour in cold water or milk while stirring gently. The batter should be smooth and thick enough to coat the back of a spoon. Using cold liquid slows gluten formation, keeping the coating light and crispy when fried.
Step 3: Rest the Batter
Let the batter rest for five minutes. This allows the flour and cornstarch to fully hydrate, improving adhesion to the onion rings and preventing the coating from sliding off during frying. This simple step helps create the best batter for onion rings without needing eggs or fillers, ensuring a light, crispy, and golden finish every time.
Preparing the Onions Correctly
Peel onions fully. Slice evenly. Separate each ring gently. Pat rings dry with paper towels. Moisture causes oil splatter and weak coating.
Lightly dust rings with flour before battering. This helps batter stick. It is a small step that fixes many coating issues.
Making Onion Rings: The Frying Process
This is where most mistakes happen.
Heat the Oil
Heat oil to 175–180°C (350–360°F) before frying. Maintaining this temperature ensures the onion rings cook evenly. Oil that’s too cool soaks into the batter, making soggy onion rings, while oil that’s too hot burns the coating before the onions cook through. Steady heat is key for golden, crispy results.
Coat the Rings
Dip each onion ring into the batter, ensuring it is fully covered. Let any excess drip off to avoid clumps. Work in small batches and avoid overloading the batter bowl, which can cause uneven coating and reduce crispiness.
Fry in Batches
Lower rings into oil slowly. Do not crowd the fryer. Crowding drops oil temperature. Fry for two to three minutes. Turn once. Remove when golden onion rings appear. This step defines making onion rings that stay crisp.
How to Avoid Soggy Onion Rings
Soggy onion rings come from five common issues.
- Oil too cool
- Batter too thin
- Overcrowding the fryer
- Wet onions
- Poor draining
Always drain on a wire rack, not paper towels alone. Airflow keeps the crust crisp. Season immediately after frying. Salt sticks better to a hot coating.
Baking and Air Fryer Options (Optional)
Fried onion rings taste best. Still, some prefer lighter methods.
Oven Method
Coat the onion rings in batter and place them on a greased baking rack. Bake at high heat, flipping once halfway through for even cooking. This method produces crisp onion rings, though they are slightly less rich and golden compared to deep-fried versions.
Air Fryer Method
Spray battered rings lightly with oil. Air fry at 200°C. Shake halfway. Texture improves but differs from classic frying. For frozen options like aviko onion rings, followthe package instructions for best texture and safety.
Onion Ring Sauce Ideas
No onion rings recipe feels complete without sauce.
Classic Onion Ring Sauce
- Mayo
- Ketchup
- Mustard
- Paprika
Mix and chill for ten minutes.
Spicy Sauce
Enhance your Onion Ring Sauce by adding a few drops of hot sauce or a pinch of chili powder. This gives a subtle heat that complements the sweetness of the onions and adds a flavorful kick to your golden onion rings.
Garlic Dip
Mix mayonnaise, garlic paste, and a squeeze of lemon juice to make a flavorful garlic dip. A good Onion Ring Sauce balances the crunch of golden onion rings with creamy, tangy flavors, enhancing every bite.
Why We Love Onion Rings
Onion rings offer contrast. Crunch outside. Soft inside. Sweet onion flavor. They pair well with burgers, sandwiches, and grilled food. They work as snacks or sides. From home kitchens to commercial menus, onion rings stay popular because they feel familiar and satisfying.
At Crown Foodservice, onion rings remain a staple across foodservice menus due to strong demand and easy pairing.
Common Mistakes to Avoid
Avoid these errors if you want reliable results.
- Using warm batter
- Skipping flour dusting
- Frying too many rings at once
- Letting fried rings sit stacked
Fixing these improves texture and color fastness.
Onion Rings for Commercial Kitchens
Consistency matters in large kitchens. Standard batter ratios help. Pre-cut onions save time. Frozen options also help with portion control.
Many kitchens use branded products like Aviko onion rings to reduce prep time while keeping quality steady. Reliable oil management and temperature control are critical at scale.
Conclusion
Learning how to prepare onion rings is about control. Control the batter. Control the oil. Control moisture. When done right, onion rings turn crisp, golden, and light. They never feel greasy. They never turn soft too fast.
Whether you cook at home or serve customers, the same rules apply. Quality ingredients. Simple steps. Clear timing. That approach delivers results every time. For professional-grade supplies and consistent results, Crown Foodservice supports kitchens that value quality and clarity. Contact us to learn more about our premium onion ring products and kitchen solutions.
FAQs
What onions work best for onion rings?
Large yellow or white onions work best. They hold their shape and fry evenly, giving you golden, crisp onion rings every time.
Why are my onion rings soggy?
Onion rings usually turn soggy when the oil temperature is too low or the batter is too thin. Ensuring proper heat and a well-balanced batter creates crisp, golden rings every time.
Can I make onion rings ahead of time?
Onion rings taste best when served fresh. Reheating them can reduce their crispness and golden texture, so it’s ideal to fry them just before serving.
What oil is best for frying onion rings?
Use oils with high smoke points, such as palm oil or sunflower oil. These oils maintain steady heat, helping onion rings cook evenly and stay golden and crispy.
Can I bake onion rings instead of frying?
Yes, you can bake onion rings, but the texture will be less crisp and golden compared to frying. Baking is a lighter alternative, ideal for a healthier option.